Create a firewall
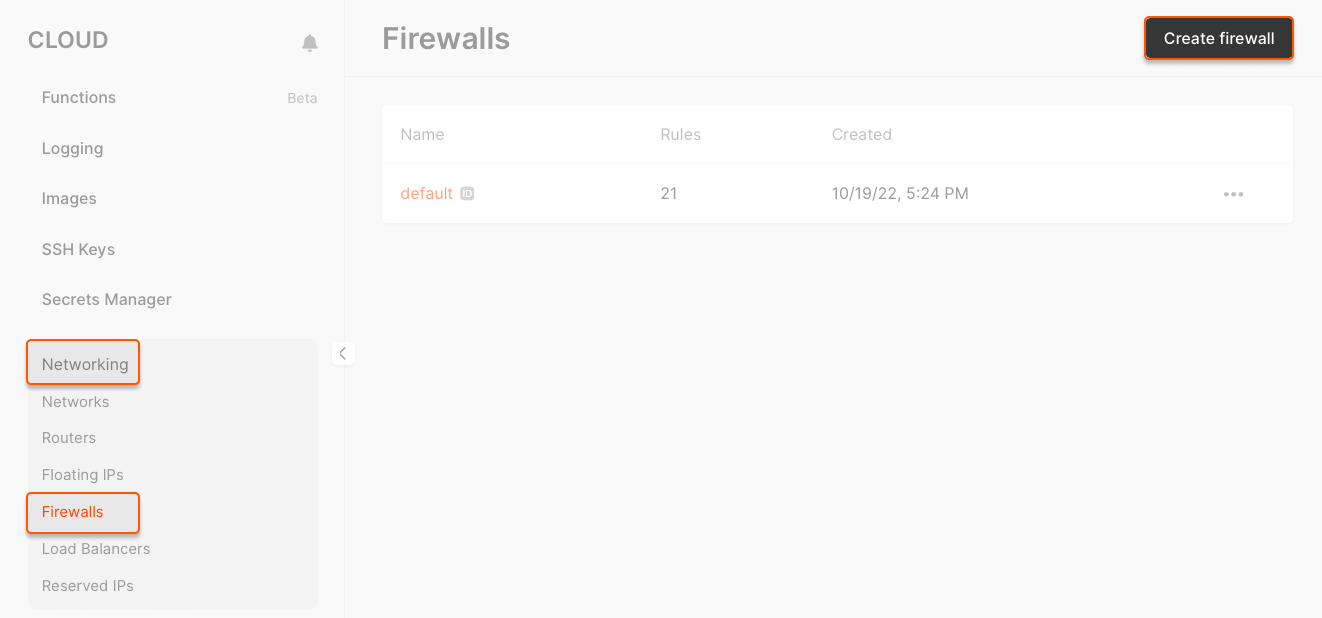
If you don’t create a custom firewall, the default firewall will be used. 1. Open a window to create a firewall. You can do this in two ways:- In the Cloud menu, go to Networking > Firewalls > Create firewall.
- When you’re creating a Virtual Machine, navigate to Firewall settings and select Add a Firewall.
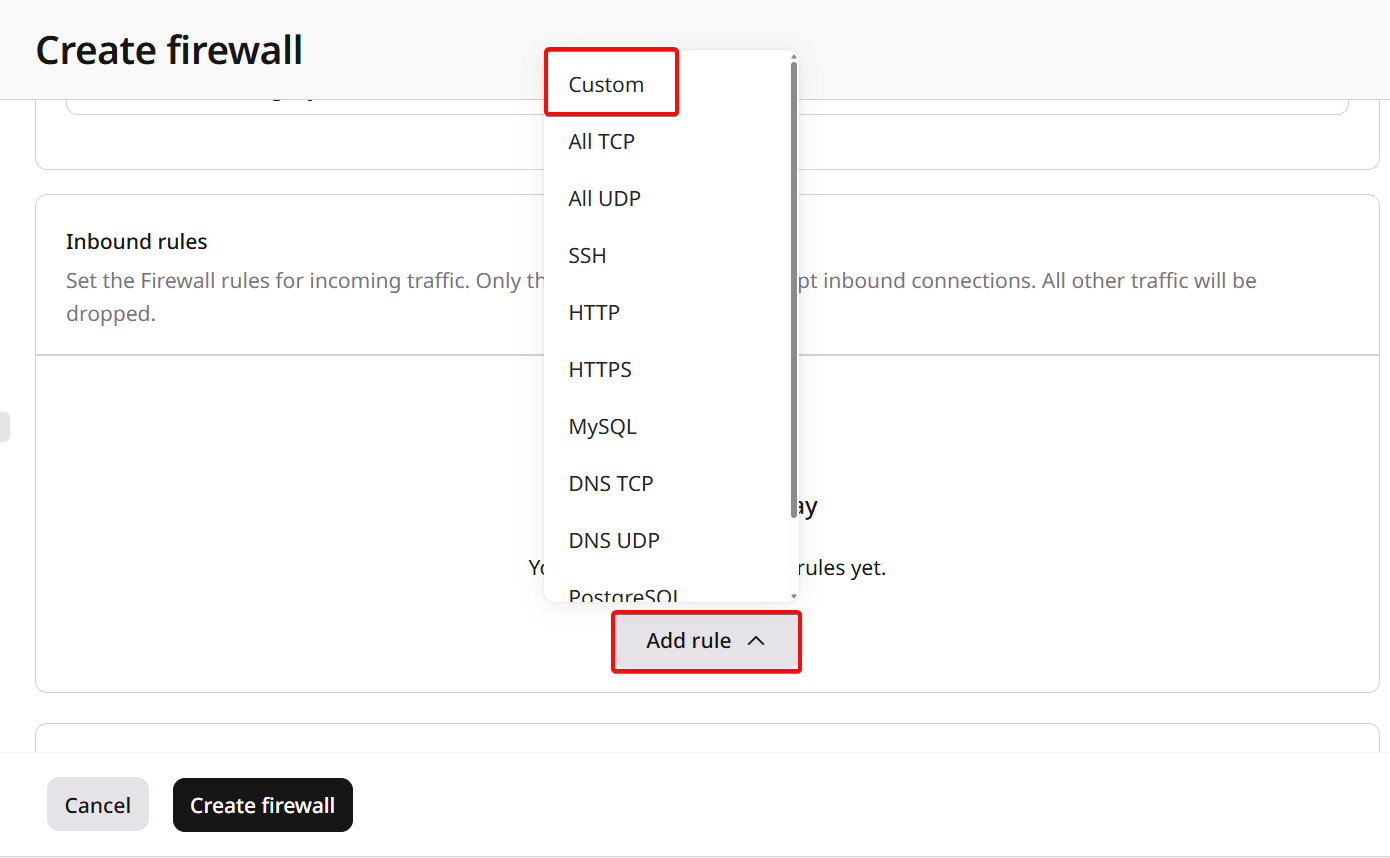
Click Add rule and select one of the template rules, or choose Custom to apply custom settings.
- Template rules (All TCP/All UDP/SSH/HTTP/HTTPS/MySQL/DNS TCP/DNS UDP/PostgreSQL/RDP): template rules come with pre-configured protocols and ports for typical connections
- Custom rule: if you select a custom rule, specify the protocol and port manually.
The Remote Desktop Protocol (RDP) template only adds a rule for port 3389/TCP. To enable RDP over UDP, create a Custom rule for port 3389/UDP.
- IP with mask: Specify an IP address range in CIDR format (for example, 192.168.1.0/24). If left empty with “All IPv4” selected, the rule applies to all IP addresses.
- Select security groups: Choose existing security groups to allow traffic from the instances associated with those groups.
By default, outbound traffic over port 25 (TCP/UDP) is restricted, while all other outbound ports are open.
- Template rules (All TCP/All UDP/SSH/HTTP/HTTPS/MySQL/DNS TCP/DNS UDP/PostgreSQL/RDP): template rules come with pre-configured protocols and ports for typical connections
- Custom rule: if you select a custom rule, specify the protocol and port manually.

- IP with mask: Specify an IP address range in CIDR format (for example, 192.168.1.0/24). If left empty with “All IPv4” selected, the rule applies to all IP addresses.
- Select security groups: Choose existing security groups to allow traffic to the instances associated with those groups.
Use the default firewall
If you don’t specify which firewall to apply to your Virtual Machine, the default firewall will be applied. The default firewall contains inbound rules that allow the following traffic for both IPv6 and IPv4 addresses:- SSH connections over TCP protocol on port 22
- RDP connections over TCP and UDP protocols on port 3389
- Internet Control Message Protocol (ICMP) connections
Manage a firewall
Firewalls protect your cloud infrastructure by filtering network traffic based on defined rules. Use the steps below to configure firewall rules, assign them to Virtual Machines, or delete a firewall if needed.Add, change, and delete rules
1. Go to the Networking tab > Firewalls. 2. Find the required firewall, click the ⋯ menu on the right and select Rules.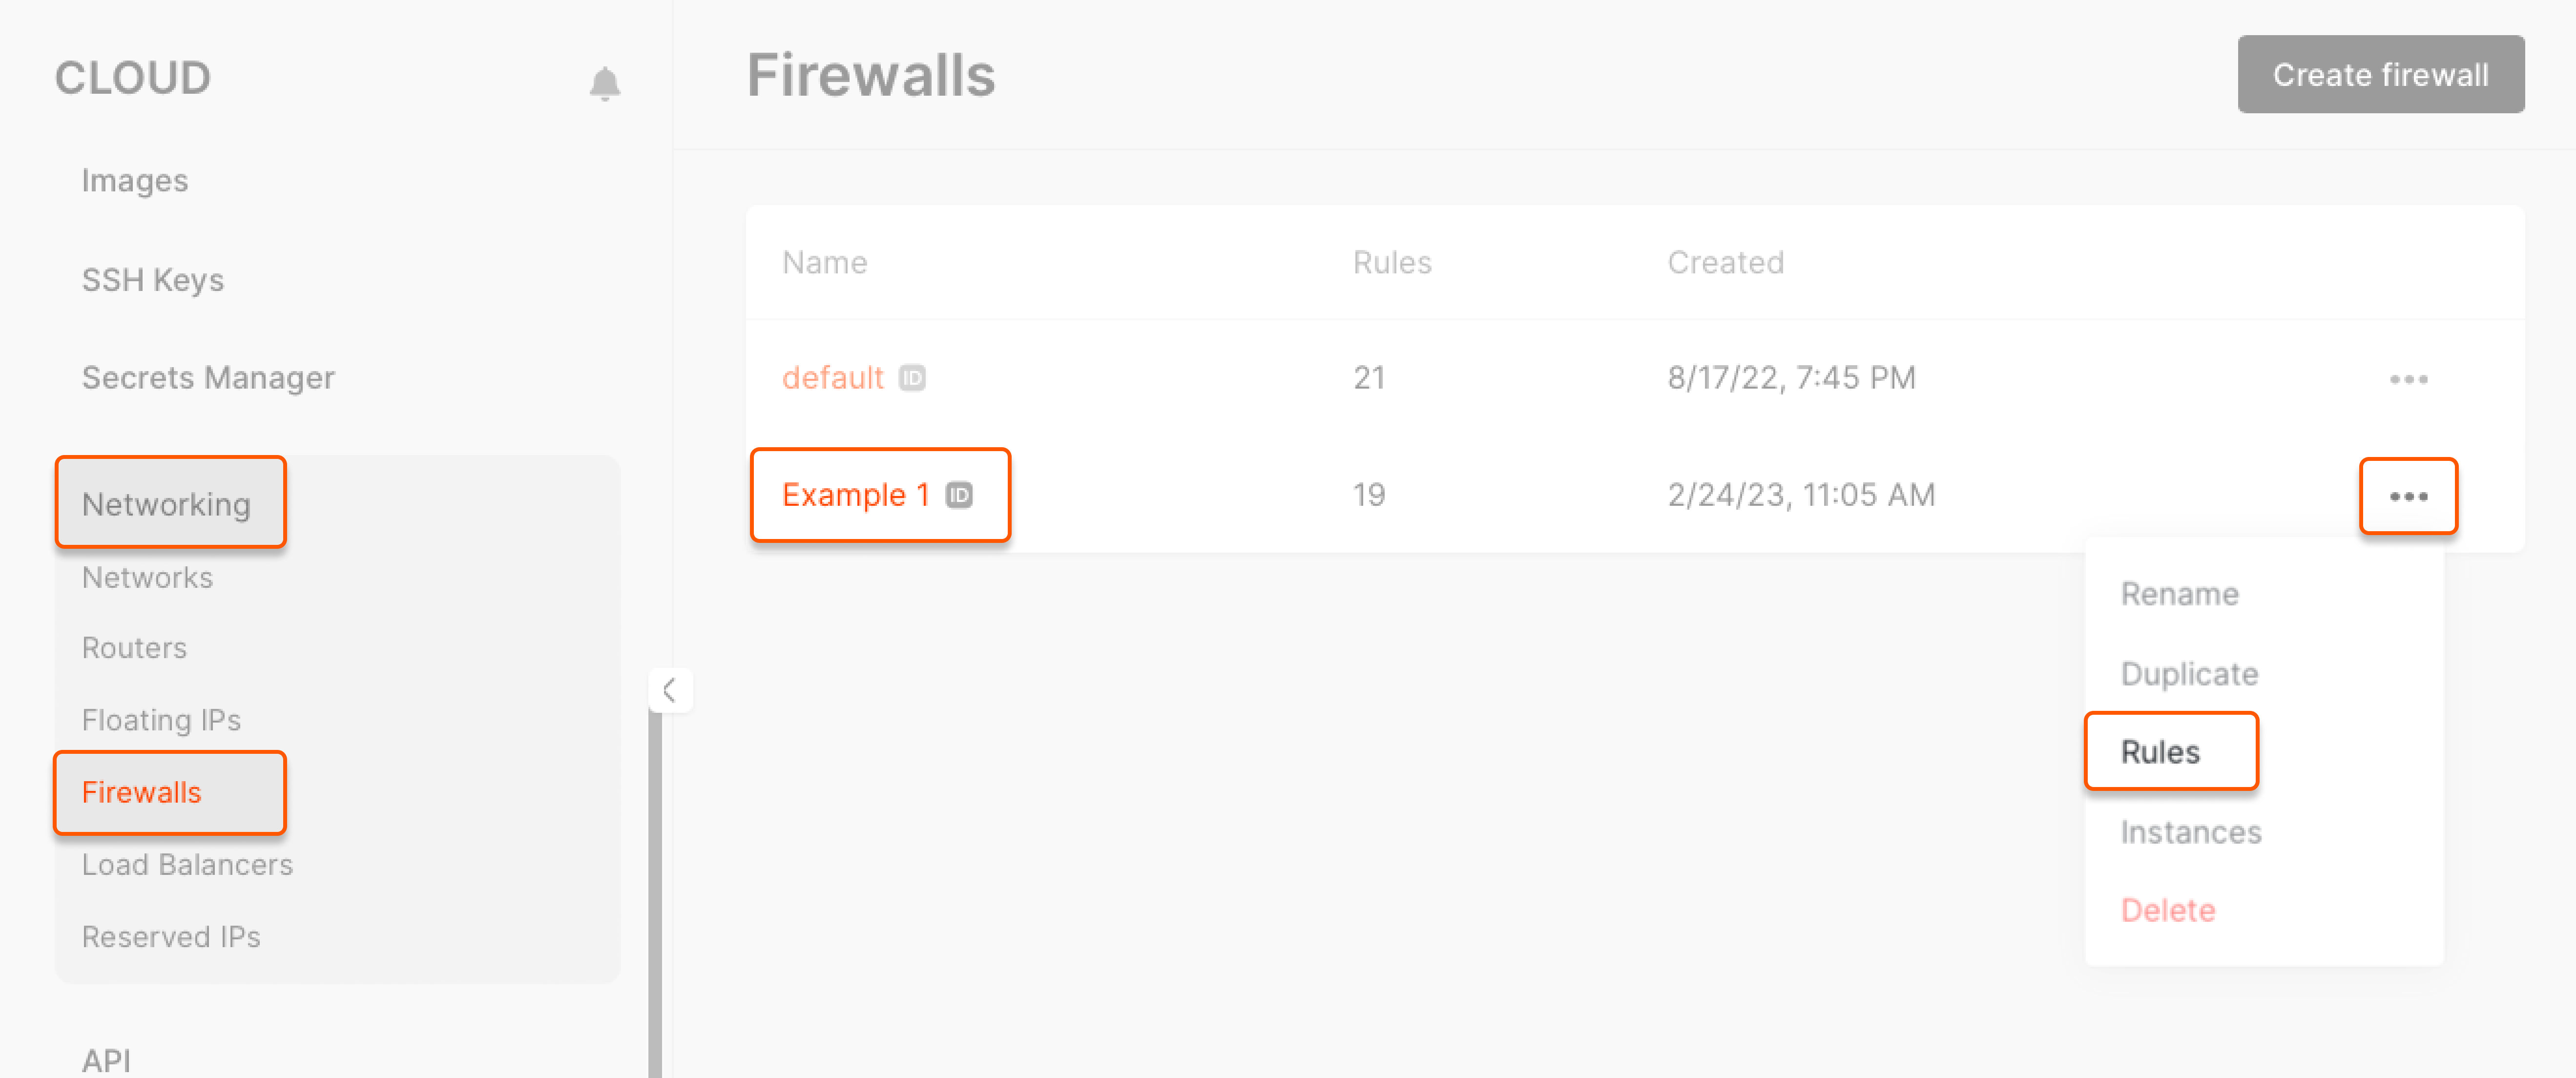
Assign to a Virtual Machine and detach from it
Firewalls can be assigned to Virtual Machines or detached when no longer needed. If the target firewall is already applied to the Virtual Machine, no changes are made: the system automatically detects the current state and skips unnecessary updates. 1. Go to the Networking tab > Firewalls. 2. Find the required firewall, click the ⋯ menu on the right and select Instances.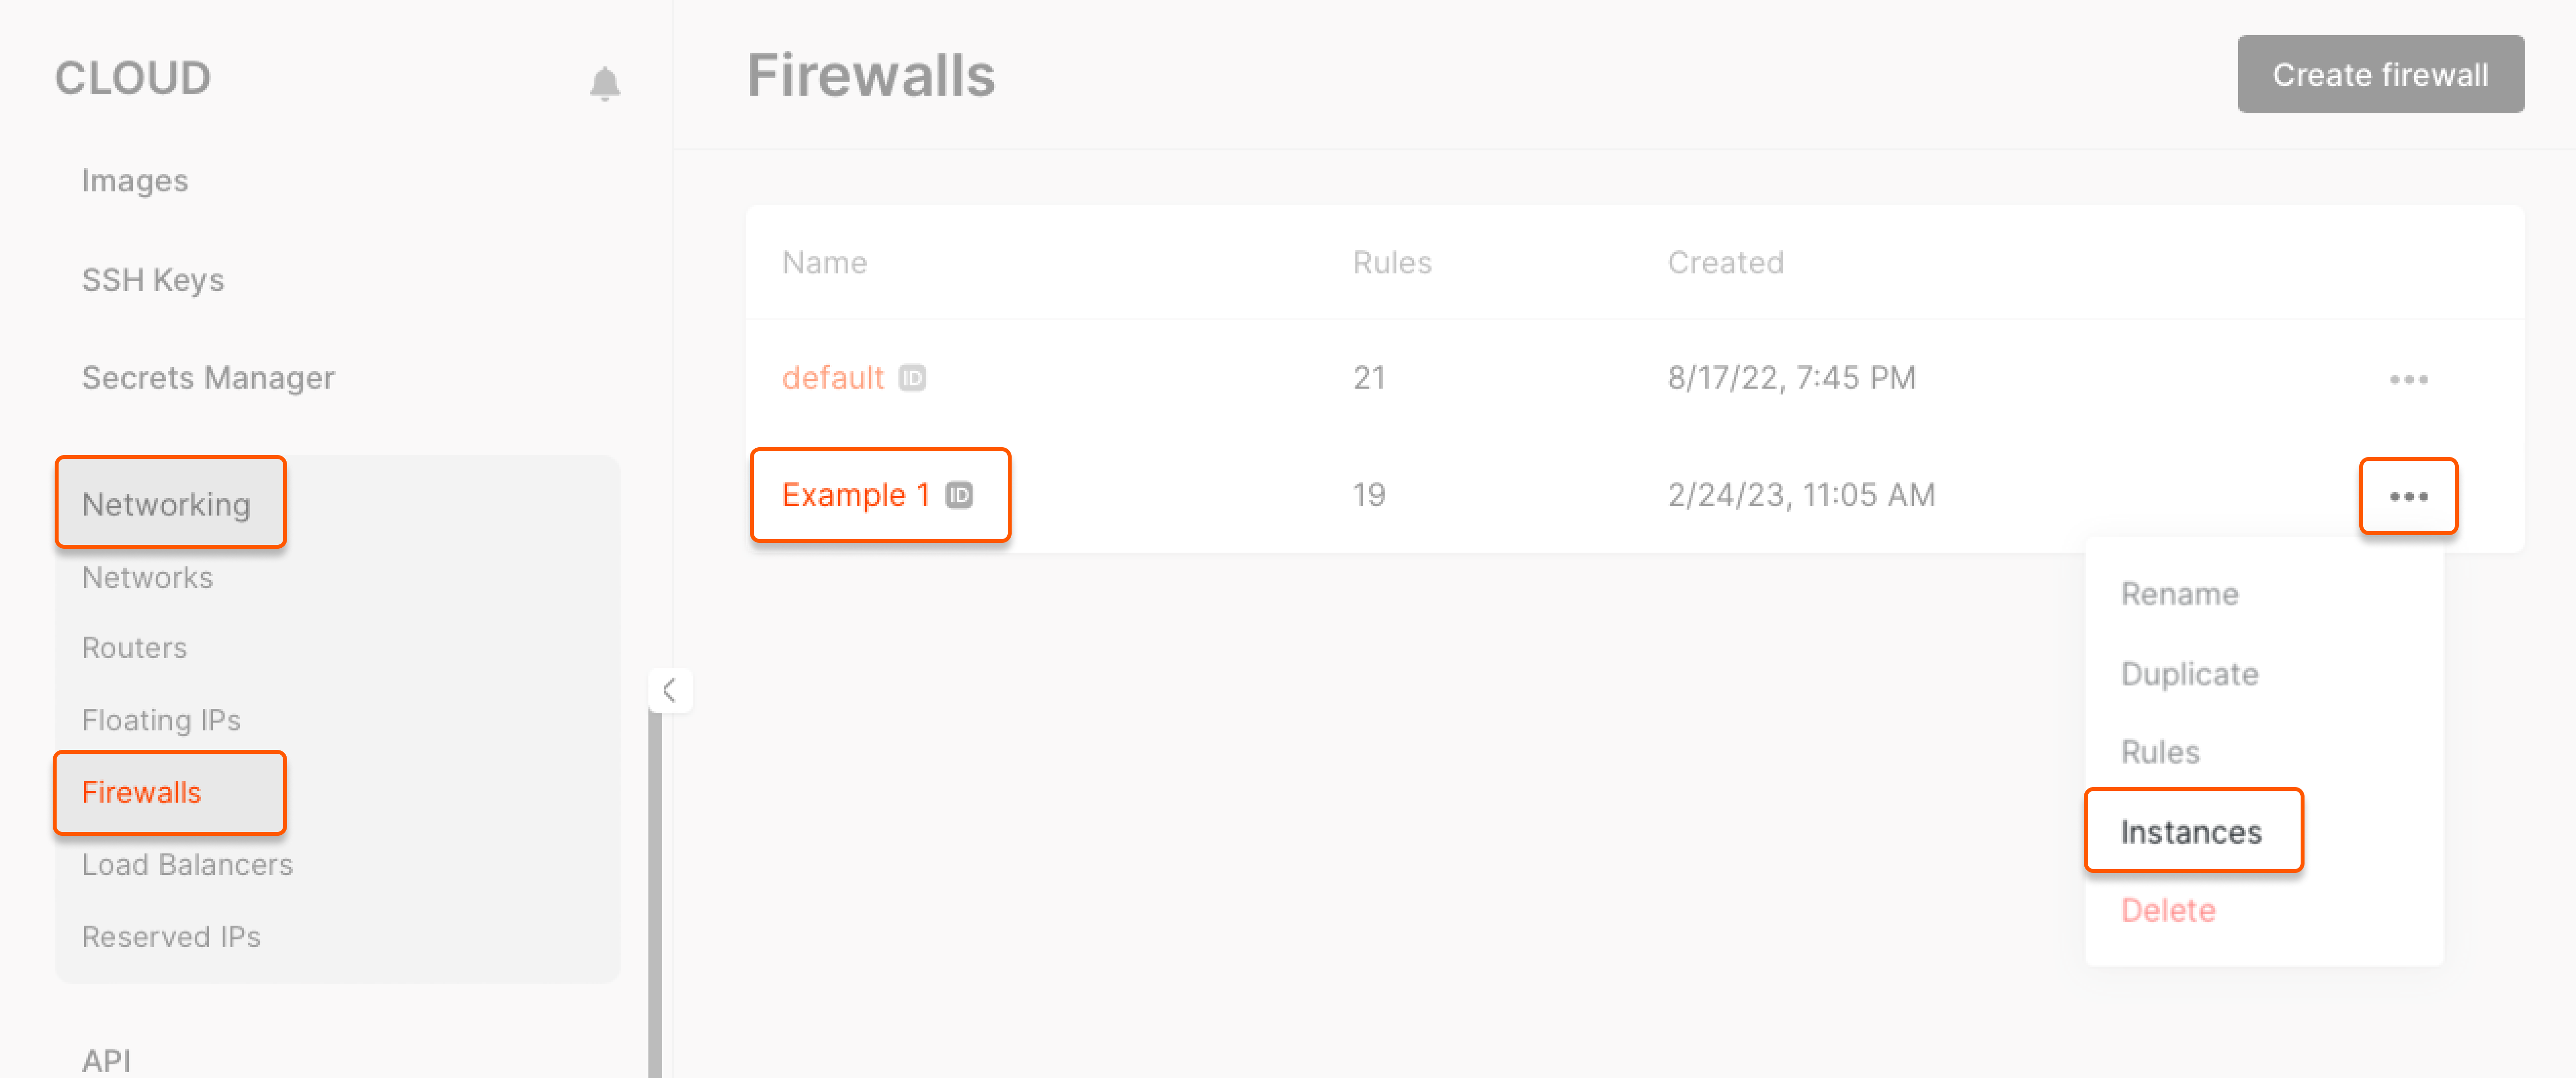
Delete a firewall
1. Go to the Networking tab > Firewalls. 2. Find the required firewall, click the ⋯ menu on the right and select Delete.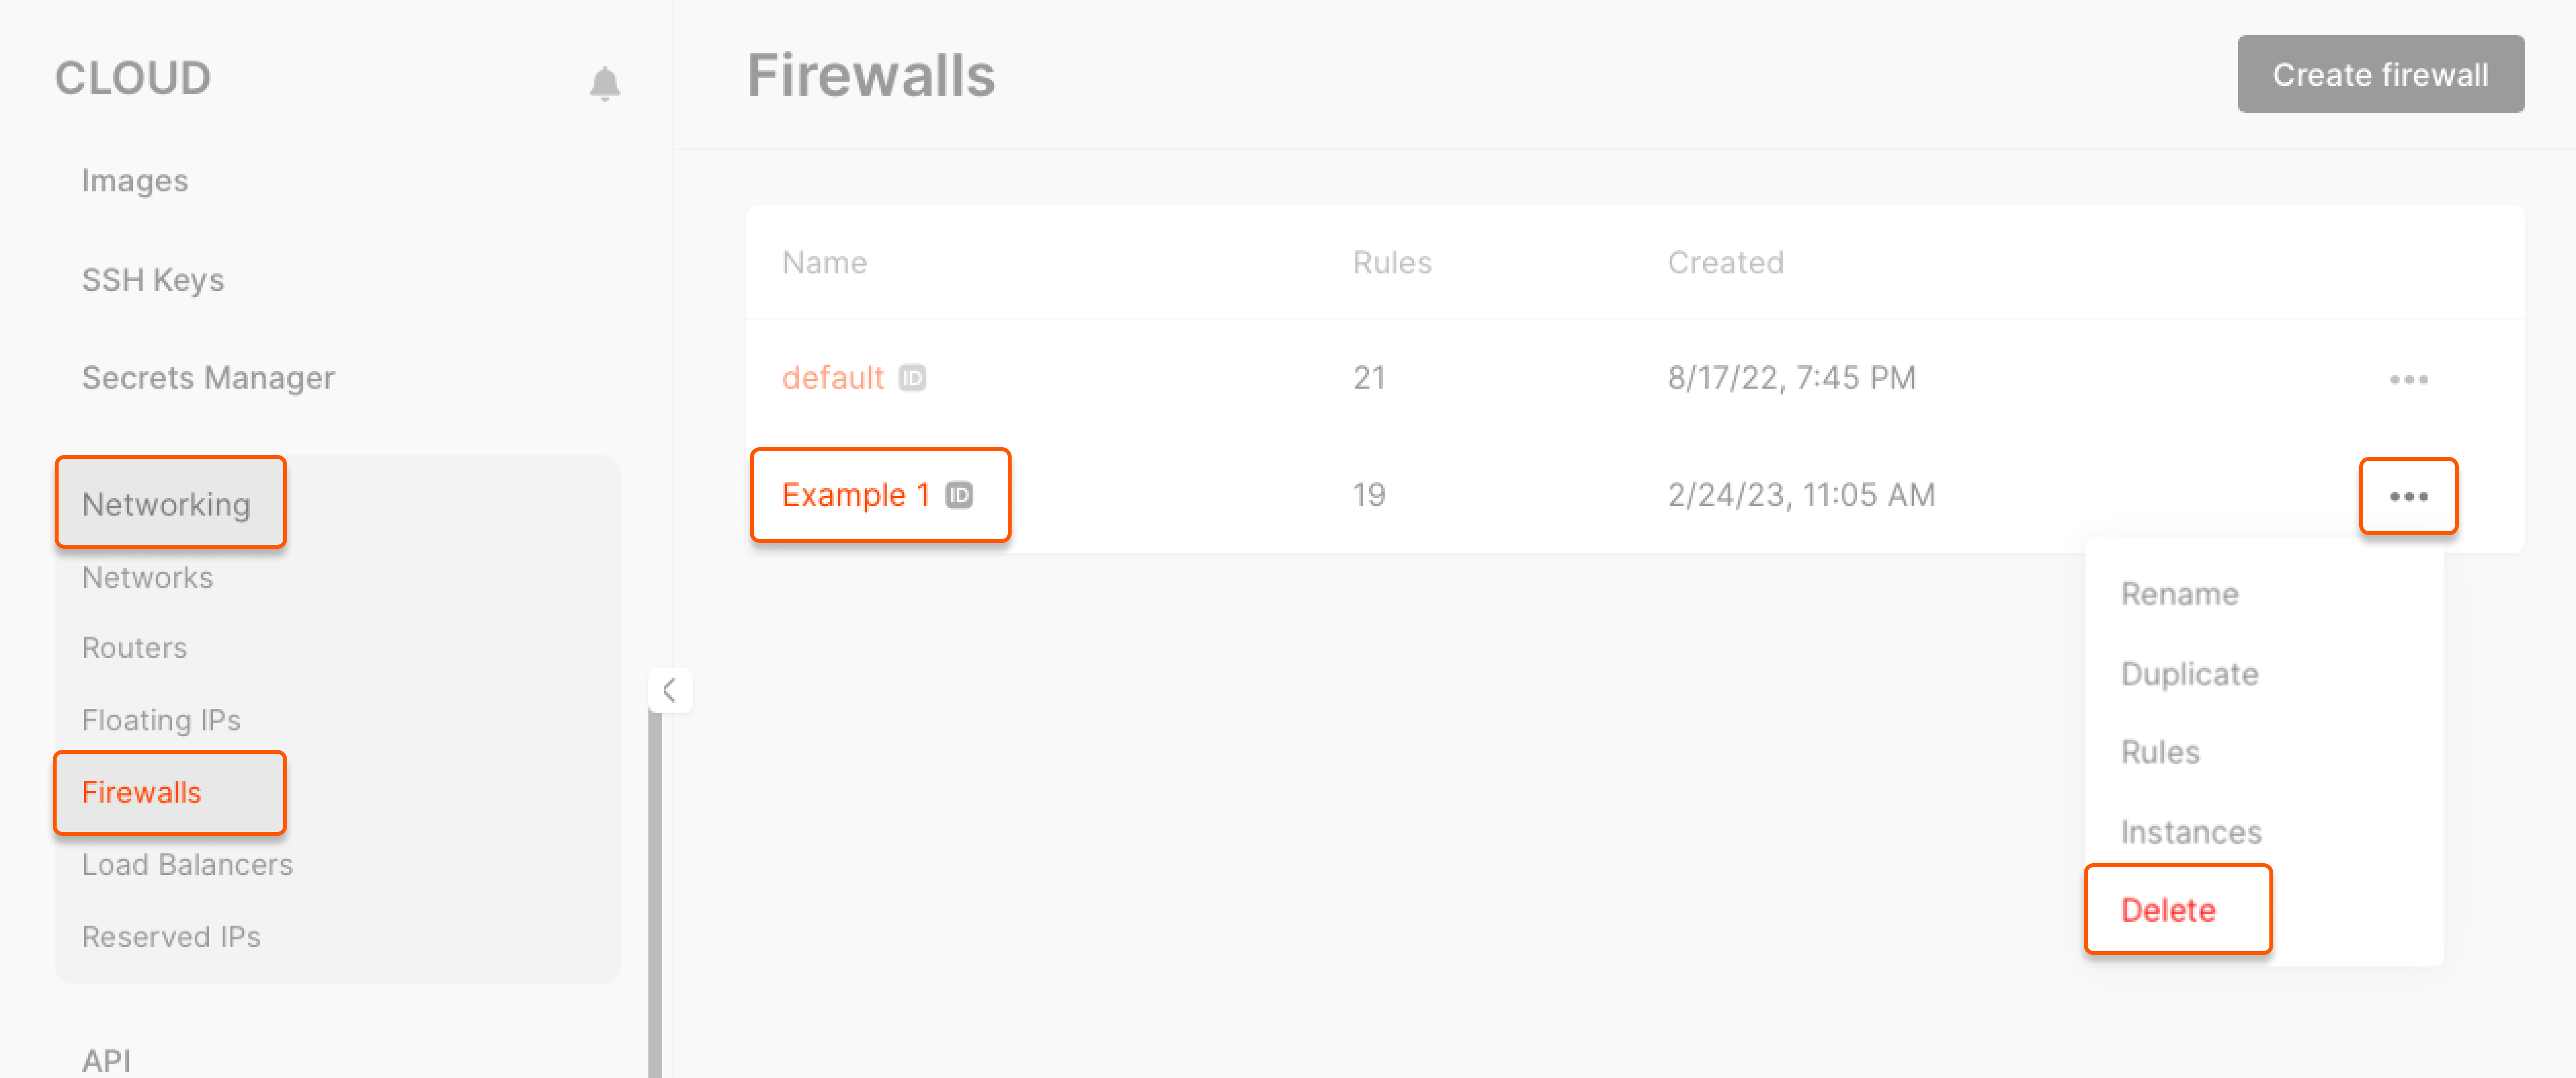
Restore a default firewall
To restore the default security group settings, you can either use the API or click Restore Default in the Firewall Rules section. This will restore any custom changes made to the firewall settings to their default configuration.
Firewall feature not supported for Bare Metal servers
The Firewall feature is not supported for Bare Metal servers. Unlike Virtual Machines or other cloud services that integrate with cloud-native firewalls, Bare Metal servers operate directly on physical hardware and are not subject to the same level of firewall management.
- You can manually configure network security using solutions like iptables or nftables (recommended) to protect your server at the network level. Other similar solutions can also be used to set up necessary firewall rules based on your security needs.
- For an additional layer of protection, opt for Gcore DDoS Protection to keep your server available during attacks. DDoS Protection redirects traffic to the Threat Mitigation System (TMS), which performs filtering and threat detection, preventing service disruptions with its always-on mode.